LightBlog

dimanche 2 octobre 2022

What is an AI Image Generator and how does it work?

In 2022, we’ve seen the advent of some incredible text-to-image generators. The first to set off the big wave was Dall-E 2, with Stable Diffusion arriving a short while later. Since then, we’ve seen other tools arrive too, including Midjourney, Craiyon, and even TikTok to a certain degree. There are growing concerns when it comes to AI image-generating tools, pertaining primarily to the ethics of such tools when they can generate images of real people in places or situations that they were not actually in.

However, there aren’t only ethics to consider, either. AI image generators are trained on millions and millions of photos and have learned to identify things by way of actual existing photos created by real people. When does it become a copyright violation? If your AI accidentally generates an image that looks very similar to another design, and the creator of that image goes on to share it commercially, is someone liable for any damages? If so, who? Who is even the “artist” in this case?

There are a ton of reasons to be wary of AI image generators, and these ethical and safety concerns are merely scratching the surface. These tools can be used to create fake images that can be used to push a narrative, and they’ll only get worse with time as well. Given the incredible capabilities of these image generation tools already, it’s scary to think what they’ll be capable of doing very soon. However, if you want to make pretty images and have some fun, then there’s absolutely no harm in that.

Stable Diffusion

Stable Diffusion is the inspiration behind this article and a tool that I’ve been playing around with a lot recently. It runs locally on your computer (so you’re not fighting for resources with other users of some online tool) and it’s one of the most powerful that you can currently use. Not only does it allow you to fine-tune a ton of parameters, but you can also control the entire generation process.

Stable Diffusion suffers from all of the same AI pitfalls, with the added “danger” of accessibility. Anyone with a powerful enough computer can set it up and have it running quickly. With an i7-12700KF, an RTX 3080, 32GB of RAM, and gigabit internet, I was able to set up Stable Diffusion and generate my first images within an hour. My PC is definitely on the higher end, but you can get away with running it on weaker hardware (though you can’t generate as large images with lower vRAM and it’ll take longer).

The best thing about Stable Diffusion is that it’s entirely open source. You can implement support for it in any of your projects today if you want to, and there are already plugins such as Alpaca that you can use to integrate with Photoshop. It’s not perfect yet, but it’s extremely early in the development of these programs. You can use Dream Studio either if you’d like, though that costs money and is a bit restrictive versus setting it up locally.

What’s more, if you set up Stable Diffusion locally, there are forks such as AUTOMATIC1111’s Stable Diffusion WebUI that come with a built-in upscale tool that can increase the resolution up to four times higher. While you can generate images at higher resolutions, it is often much quicker to generate an image at a lower resolution and then upscale it. All of the images below are upscaled from smaller resolutions.

Stable Diffusion was trained on a cluster of 4,000 Nvidia A100 GPUs running in AWS and took place over a month. It has the ability to generate images of celebrities and has a built-in NSFW filter as well. You can disable this NSFW filter on local installations, as it actually saves on resources by decreasing VRAM usage. As for what “Diffusion” means, it’s the process of starting with pure noise and refining over time. It makes the image incrementally closer to the text prompt over time until no noise is left. This is the same way that Dall-E 2 works.

Finally, another fun feature that Stable Diffusion has is “img2img”. In this, you give it an image as a prompt, describe what you want the image to be, and then let it give you a proper drawing.

Stable Diffusion img2img

I gave it a template to work with and got back a pretty decent image. I’m sure with better prompts (mine is somewhat contradictory), you could get even better. Still, not bad at all for something that took me about five minutes to make.

In short, Stable Diffusion is free, easy to set up, and the biggest issue is how accessible it is. If you don’t have a powerful enough PC, you’ll need to pay to use this through the likes of Dream Studio.

Craiyon

Craiyon was previously known as DALL·E Mini, though despite the name, is of no relation to Dall-E 2. It was created in order to reproduce the results of OpenAI’s DALL·E text-to-image model. Craiyon is available to the public and can be used to generate images that are surprisingly decent, though the images aren’t as accurate, nor are they as high-quality. Image resolutions max out at 256×256, and there are no upscaling tools, either.

Craiyon AI art generator

Craiyon is completely free to use and accessible through its website. You can generate any image via any prompt, and the only catch is that the images are lower quality and that you’ll need to wait two minutes or so for each batch of images generated. Craiyon started as an open-source model aimed at reproducing the results of the initial DALL·E model. The model now being used is known as DALL·E Mega, and it packs several improvements.

Craiyon, unlike the other options here, is supported by advertisement revenue. As a result, you’ll see paid sponsorships and other advertisements on their website when you visit. There is also an app for Android smartphones. It’s not the most sophisticated, but it’s fun, easy to use, and accessible.

Craiyon - AI Image Generator (Free, Google Play) →

Dall-E 2

Dall-E 2 is a product of the OpenAI research lab and is the most well-known AI image generator that people think of. It’s a closed-off tool with limited access, but for those that can access it, some of the results that it can come up with are incredible. It was initially closed off due to concerns surrounding the ethics and safety of such a tool, though it has expanded gradually over time.

One of the biggest advantages that Dall-E 2 has is the ability to create photorealistic images that, at a glance, are indiscernible from real photographs. It can generate paintings, images that look to have been captured on real cameras, and entirely made-up scenarios. It represented a huge jump in the capabilities of AI when it was first announced, both in its abilities to make images and in its Natural Language Processing, known as NLP. This is thanks to its implementation of GPT-3, which is one of the most advanced language models out there and is also authored by OpenAI.

Just like with Stable Diffusion, Dall-E 2 also has its own ability to take existing images and modify them based on a prompt. You can edit photos through it by asking it to add something to an image, or even ask it to remove something or to change the lighting. While it only creates square images, OpenAI announced Outpainting last month that can expand your images wider, taking into account the context of what’s already available in your square image.

Dall-E 2 is available for all to try out.

Midjourney

Midjourney is an interesting one as it’s a public platform that can generate images, though you do it through a Discord server. Not only that, but after you generate 25 images, you’ll need to subscribe to the service to continue generating new ones.

While Midjourney is probably the most accessible platform here (given you can access it from any device with a Discord account), it also costs you money. However, you do get quality out of it. A user of the service, Jason Allen, created a piece that he dubbed “Théùtre D’opĂ©ra Spatial”. He entered it into the Colorado State Fair art competition… and won.

Unlike these other projects, Midjourney is a proprietary artificial intelligence program. There is no source code that you can look at, and its entire purpose at this point in time is limited to usage within a Discord server. As for why it’s a Discord server only, David Holz, founder of Midjourney, said the following to The Verge in an interview.

We started off testing the raw technology in September last year, and we were immediately finding really different things. We found very quickly that most people don’t know what they want. You say: “Here’s a machine you can imagine anything with it — what do you want?” And they go: “dog.” And you go “really?” and they go “pink dog.” So you give them a picture of a dog, and they go “okay” and then go do something else.

Whereas if you put them in a group, they’ll go “dog” and someone else will go “space dog” and someone else will go “Aztec space dog,” and then all of a sudden, people understand the possibilities, and you’re creating this augmented imagination — an environment where people can learn and play with this new capacity. So we found that people really like imagining together, and so we made [Midjourney] social.

Back then, you also would have trouble steering it away from the default “Midjourney” style, so to say. That’s according to Holz, anyway, in the same interview.

[W]e have a default style and look, and it’s artistic and beautiful, and it’s hard to push [the model] away from that.

However, since then, the company has rolled out two new models — “test” and “testp”. “test” is a general purpose model, and “testp” is focused solely on photorealism. As a result, you’ll be able to get away from that more default look and generate images of more types if you’d like.

The dangers and ethics of AI-generated art

AI-generated art, while cool, imposes a number of dangers on society at large. In an age where it can be hard to tell at times when the news is taken out of context or straight-up fabricated, there comes a danger when images can be made in a matter of minutes that look and feel real. For example, take a look at the photos that I generated below. One was generated using Stable Diffusion, and the other was generated with Craiyon.

Prompt: “crashed UFO at Roswell, 1947, lighting, army general investigating, studio lighting”

The above photos depict a crashed UFO at Roswell and the first image shows what looks like a person walking on top of the crashed UFO. While the image here was generated for the purpose of showing a fake photo, it looks like it could be real. Any artifacts can be explained away by the fact that photos in 1947 would have been of a poorer quality anyway, and both images could pass the eye test at a quick glance at being real. You don’t even need one of the best computers to do something like this, as Craiyon is a free application.

Where it gets even murkier is that you can actually specify an artist that you want the algorithm to take inspiration from. A common artist is Greg Rutkowski, who has spoken outwardly against the usage of his name in AI-generated art. His name ranks as one of the most common prompts used in image generation. “A.I. should exclude living artists from its database,” Rutkowski told artnet in an interview, “focus on works under the public domain.” Searching Rutkowski’s name will often return AI art that’s been generated to look like his work but isn’t actually his work.

Even worse is that AI-generated art can often highlight the biases of the human race. Craiyon even has a warning at the bottom of its home page in the FAQ, stating that “because the model was trained on unfiltered data from the Internet, it may generate images that contain harmful stereotypes.” As a result, entering prompts such as “company executive” will most often return images of white men in suits. Likewise, entering “teacher” as a prompt will almost always return women in classrooms.

The future of AI-generated art

Given that it appears the industry isn’t slowing (and regulation isn’t catching up) we expect to see even more advancement in these areas. The fact that we’ve gone from the capabilities of Dall-E 2 (even if it was private) to Stable Diffusion in just a few months shows how big an industry this is, and how big of an industry it can potentially be. Images that could previously have been contracted to a team of artists can now be generated in seconds, with a single artist instead involved in the process for correctional purposes. We’ve already seen how Midjourney can help win you an art competition, for example, though the U.S. Copyright Office currently says that you can’t even copyright AI-generated images.

As Holz also stated in his interview, the current cost of training each model is around $50,000 — or more. Images also cost money as they are generated on incredibly beefy servers, especially when huge numbers of users come to generate their own images. It’s going to be massively cost-prohibitive for any new players entering the space, which may in turn actually put some companies off as well. However, initial efforts such as Stable Diffusion being open source do bode well.

As a result, we’ll be waiting excitedly to see the future of AI images. The space has evolved so quickly in the last year, and it seems that new advancements are being made daily. However, with glimpses of AI-based image manipulation even coming to our smartphones, there’s a lot that could happen in the next year or two.

The post What is an AI Image Generator and how does it work? appeared first on XDA.


from XDA https://ift.tt/cP5Bt3z
via IFTTT

Botslab NaviClean S8 Plus robot vacuum review: Mid-price sweeping and mopping robot with an auto-empty station

People buy robot vacuum cleaners to make their daily cleaning easier and effortless. But standalone robot vacuums have a small dustbin, which is good for a few cycles but it does require human intervention regularly to empty. And emptying the onboard dustbin on a robot vacuum cleaner can become a tedious task if you have a lot of carpets, dusty floors, or pets, since these inherently attract more dirt and dust. The Botslab NaviClean S8 Plus robot vacuum with its auto-empty station means that you only need to change the dust bag about once per month, which is good news for people who cannot do it on the daily. The robot vacuum also has a decent-sized water tank if you want to sweep and mop your floors at the same time too.

Botslab NaviClean S8 Plus robot vacuum mid-price sweeping and mopping with auto empty station eileenbrown xda developers

    Botslab NaviClean S8 Plus
    The Botslab two-in-one robot vacuum and mop automates the tedium of your daily cleaning routine

      Features:

      Pros:

      Cons:

Navigate this review:

Botslab NaviClean S8 Plus: Pricing and availability

Botlsab is the new brand name for the 360 range of robot vacuums and the branding has not settled across all online stores. Currently, Botslab only seems to deliver two products, a robot vacuum, and a smart camera. However, the Smart360 brand offers a range of well-performing robots across a range of prices. The Botslab NaviClean S8 Plus is a mid-priced robot offered for sale. It is available from Amazon at $499.99

Specifications Botslab NaviClean S8 Plus
Dimensions L*W*H 340*340*95 mm (13.4*13.4*3.7 inches)
Rated Voltage (V)  14.8 V
Rated Power (P) 30 W
Battery (mAh) 5000 mAh
Working Time (min) 250 | 210 | 140 | 110
Suction (Pa)  600 | 1000 | 1500 |2700
Dust Bin (L)  0.35 L
Water Tank (L) 0.3 L
Noise (dB) 59 | 61 | 63 | 65
Obstacle Climbing 20 mm (0.79 inches)

About this review: This review was written after testing a Botslab NaviClean S8 Plus for a period of three months, provided by the company. Botslab did not have any input in this article.


Botslab NaviClean S8 Plus: What’s in the box?

The Botslab NaviClean S8 Plus robot vacuum comes in one large box containing everything you need to get started. There is the robot vacuum cleaner with an onboard dustbin and water tank, an auto-empty station, a mop bracket, and a mop pad. There is also a spare dust bag, a roller cleaning tool, a brush, and a user manual.

Botslab NaviClean S8 Plus robot vacuum mid-price sweeping and mopping with auto empty station eileenbrown xda developers

To use the robot vacuum cleaner, connect the auto-empty station to your power supply, remove any packing from behind the bumper and film from the robot vacuum, switch on the power to the robot vacuum and place it on the auto-empty station to charge. You also need to press the power switch on the top of the robot vacuum if this is not already on. The robot will announce that it is charging in an irritatingly friendly voice. There should be a white LED light on the auto-empty station to indicate power to the station.

The Botslab NaviClean S8 Plus robot vacuum bundle contains everything you need to get started with automated cleaning and mopping - all controlled by an app.

You can start the robot by using the switch on the top of the robot and send it home by another switch – but to get the best out of the NaviClean S8 Plus, install the Botslab app and configure your preferred settings.


Design and features

Botslab NaviClean S8 Plus robot vacuum mid-price sweeping and mopping with auto empty station eileenbrown xda developers

A robot vacuum and auto-empty station that can be controlled by an app and which integrates with Alexa, Siri, and Google Home.

  • Simultaneous mopping and vacuuming
  • Comprehensive app
  • Multi-map management
  • 2D and 3D map views
  • Room division and no-go zones

The Botslab NaviClean S8 plus is simple to pair with the app on your mobile phone. Download the Botslabb app and create a user account. Scan the QR code in the user manual or search for the robot vacuum on the list of devices to connect to.

The app will connect to the robot over a 2.4GHz Wi-Fi network (most smart apps work best over a 2.4GHz Wi-Fi connection). The app saw the robot and quickly connected without issues.

Fully featured app

The app has a lot of configurable features for the NaviClean S8 Plus. You can configure the app to get the robot to clean a room, the whole house, or simply an area. You can specify whether you want to clean the area once or twice, set no-go zones, and divide a room. You can specify how much water you want to use when the mop module is installed and set whether you want the robot vacuum to mop, vacuum, or vacuum and mop.

Customized settings

You can further customize the app for fully automated cleaning. You can specify the do-not-disturb time so that the robot will not operate during this period. You can specify that the robot increases suction power when crossing any carpet it detects and turn the button light off if you think that the robot light is too bright.

Botslab NaviClean S8 Plus robot vacuum mid-price sweeping and mopping with auto empty station eileenbrown xda developers

You can set a range of different schedules for cleaning specifying if you want the robot to clean daily, on weekdays, weekends, or once only, and what time you want cleaning to start. You can also specify which area or room to be cleaned – or set the cleaning for the whole house.

Botslab NaviClean S8 Plus robot vacuum mid-price sweeping and mopping with auto empty station eileenbrown xda developers

When the robot is operating, you can change the schedule, pause, change settings or send the robot back to its charging station. You can even use your mobile device as a remote control to send the robot to a specific area to clean.

Botslab NaviClean S8 Plus robot vacuum mid-price sweeping and mopping with auto empty station eileenbrown xda developers

Minor irritation: The voice chime is annoying

The biggest irritation for me is the over-cheerful, saccharine sweet voice of the robot. It sounds like an over-enthusiastic sales assistant desperately wanting to make a sale. If I paused the cleaning cycle and restarted it, the robot would announce “Cleaning makes me happy!” whilst setting off. I wanted to stamp on it. Fortunately, you can change the volume of the voice notification. However, if you turn the voice down by too much, you will not be able to hear it cheerily announce “ I’m here!” when you tap the ‘find robot’ icon.


Who should buy a Botslab NaviClean S8 Plus robot vacuum?

  • Buy a NaviClean S8 Plus robot vacuum if you want to have two-in-one sweeping and mopping
  • You should buy this robot vacuum if you hate emptying the on-board dustbin every couple of days
  • Buy the Botslab NaviClean S8 Plus robot vacuum if you like to manage the vacuum cleaner via a fully featured app

There are other robots for sale at a similar price point. However, if you bought a Yeedi Vac 2 Pro at a similar price, you would additionally have to buy an auto-empty station at an additional cost. If you have mainly carpet in your home, consider buying a robot vacuum with higher suction power such as the Dreame Bot D10 which has 4000Pa suction power.

Other brand leaders offer competing products at similar price ranges. Neither the Roborock Q5 for $429.99  nor the Ecovacs Deebot T8 AIVI for $499.99 has an auto-empty station making the Botslab good value if you like to buy the entire unit as a bundle.

Why I like the Botslab NaviClean S8 Plus robot vacuum

I found the Botslab NaviClean S8 Plus robot vacuum easy to connect to the app and configure the cleaning and mopping patterns to suit my living patterns. Floor mopping is reasonable for daily mopping although once in a while, I had to resort to manually scrubbing the floor to remove ingrained dirt before continuing with the daily mopping.

Botslab NaviClean S8 Plus robot vacuum mid-price sweeping and mopping with auto empty station eileenbrown xda developers

The NaviClean S8 Plus is not the cheapest robot vacuum you can buy. But with its auto empty station and large capacity dust bin, for hands-off cleaning and minimal intervention, it is certainly worth a look

    Botslab NaviCleanS8 Plus
    A two-in one sweeping and mopping robot vacuum cleaner with a long battery life and a large capacity auto-empty station

The post Botslab NaviClean S8 Plus robot vacuum review: Mid-price sweeping and mopping robot with an auto-empty station appeared first on XDA.


from XDA https://ift.tt/A8lRSe0
via IFTTT
How to manually install OxygenOS OTA updates on your OnePlus phone

Sometimes, you need to install a system software update manually on your phone. Be it because the new one has yet to go live in your region, has introduced a new feature on a different update channel, or simply because you have rooted your device and can’t take the regular OTA, there are ample reasons to choose the manual update route. Fortunately, on OnePlus phones, installing OxygenOS OTA updates manually is a pretty straightforward process, and we’ll guide you through it here.

Navigate this article:

OnePlus 10T


OxygenOS update channels

OnePlus smartphones generally have three streams of software updates: Closed Beta, Open Beta, and Stable. Closed Beta builds of OxygenOS are available for a limited number of testers, while the Open Betas are published on the company’s forums for anyone to install. Both of these builds are used for testing to iron out bugs and other issues, along with introducing new features. Finally, Stable builds are a culmination of all of the features and bug fixes after the Closed and Open Betas have run their course.

Over the last few years, Google has continued to work closely with OEMs in an attempt to get major version updates out to devices as quickly as possible. OnePlus is one of the smartphone manufacturers that regularly partners with Google to get early versions of Android running on some of its latest devices. Such pre-release builds are usually made available through a special “Developer Preview” program, which is separate from the regular OxygenOS update channels.

The manual OTA installation process is mostly identical for different update streams. However, it may slightly vary across regional and carrier variants of OnePlus smartphones.


Can I install OxygenOS updates manually on the carrier variants of OnePlus phones?

OnePlus tends to use the Google OTA (often referred to as “GOTA”) framework instead of the OxygenOS/ColorOS OTA backend on the carrier and some global device variants. While it is still possible to sideload the updates on such non-carrier/unlocked regional devices, the carrier models (e.g. the phones sold through T-Mobile and Verizon) intentionally make it difficult to install any OTA update packages by the end-user.

Keep in mind that you might be able to cross-flash an unlocked OxygenOS build on a carrier variant and subsequently force-sideload the software updates. However, due to the incompatibility issues related to the internal differences within the modems and several other low-level firmware partitions, it is not advisable.


From where can I download an OxygenOS OTA update?

As mentioned earlier, when it comes to Developer Preview and Open Beta releases, OnePlus usually lists the initial builds on its forums. In case the successive updates require manual installation for compatibility reasons, then the company offers OTA download options from the update announcement threads. Nonetheless, it’s not a rule of thumb.

For every stable OxygenOS update, you should be able to find two types of OTA releases: Full, and Incremental. The full update packages are recommended for sideloading, as they upgrade the phone no matter what prior version is installed. They are also useful when you’re rooted, as you can extract the stock boot image from them, patch it, and flash it afterward to keep root access. An incremental update package is comparatively smaller than the corresponding full OTA, but it can be only applied on an untouched base.

As with all OTAs from different Android OEMs, the OxygenOS updates for the OnePlus phones are being rolled out in a staged fashion. The initial phase of the rollout will only reach a handful of users and once the company confirms that there are no major issues with the update, it will be rolled out to the rest of the devices.

OnePlus maintains a download portal for software updates, where the company periodically uploads the full update images for its phones. However, it often lags behind the actual update phase. The portal neither offers incremental update packages, nor you can find the Open Beta builds in there. This is where Oxygen Updater comes in.

Oxygen Updater is an open-source app that utilizes the power of crowdsourcing and intelligent OTA query to skip the rollout queueing and download the OxygenOS updates at your convenience. The app can download official update packages directly from OnePlus/Google servers, and even verifies the integrity of the downloaded ZIP file using MD5 checksums.

Oxygen Updater (Free, Google Play) →

Thanks to the close collaboration between the maintainers of Oxygen Updater and XDA, we also list the full and incremental OTA packages in OxygenOS update articles whenever possible. Thus, our readers can download the updates right on their PC/Mac, and then transfer it to their phone to perform a manual update.

Note: Due to a misconfiguration at OnePlus’ end, you may find that the OxygenOS update packages downloaded manually from the company’s server have a file extension of *.JAR instead of *.ZIP. The scenario is prevalent on mobile browsers. You have to remove the “JAR” portion from the filename and make sure that the extension of the update package is “ZIP” before sideloading.


How to manually sideload an OxygenOS update

Assuming you’re not trying to cross-flash a different regional build or a mismatched update channel release, follow the steps outlined below to perform a manual update. While it is possible to switch the firmware region or jump between update streams on OnePlus devices, only attempt those actions if you know precisely what you’re doing.

For OxygenOS 11

Here’s how to manually install an update on your OnePlus phone running OxygenOS 11 based on Android 11:

  1. Determine the regional variant of your phone. Unfortunately, deciding it based on solely the internal model number or the firmware region props is a hit-or-miss, because both sellers and users could cross-flash different regional firmware on OnePlus devices.
    • You can use Oxygen Updater to find out the variant, as it checks against an internal database which greatly reduces the probability of a wrong selection.
  2. Download the update package you want to install on your phone using Oxygen Updater. You can also find the direct links on our articles, which are easier to use on a PC/Mac in conjunction with a download manager app.
    • As mentioned earlier, try to opt for the full ZIP whenever possible. Applying an incremental update requires delta patching, which is only possible when the corresponding base version isn’t tampered at all.
  3. Move the update package to the root of the internal storage of your phone.
    OnePlus OxygenOS 11 update ZIP at root
  4. Navigate to Settings, select System, and choose the System updates option.
    OnePlus OxygenOS 11 Settings System OnePlus OxygenOS 11 System updates
  5. Tap the gear icon at the top right corner and choose Local upgrade.
    OnePlus OxygenOS 11 System updates gear icon OnePlus OxygenOS 11 Local upgrade
  6. The file that you saved to the root directory should show up here. Select the file to start the local upgrade.
    OnePlus OxygenOS 11 Local upgrade ZIP
  7. Select Install Now to manually install the OxygenOS update on your OnePlus phone.
    OnePlus OxygenOS 11 Local upgrade install
  8. Once the installation is finished, navigate to the About phone page to verify the build number.

In case you have the global variant of any OnePlus smartphone, the local upgrade option might not be visible by default. In that case, you need to install its APK first and then use an activity launcher app (example) to launch the activity named com.oneplus.localupdate.ui.home.HomeActivity to be able to start the local upgrade wizard. To know more, take a look this forum post.

Note: On a handful of devices (e.g. the OnePlus Nord 2), the OxygenOS 11 stock recovery offers the ability to flash an update ZIP file. However, those phones have already received the OxygenOS 12 update, which deprecates that feature anyway.


For OxygenOS 12 and newer

If you have a non-carrier OnePlus phone running Android 12-based OxygenOS 12 or newer and want to manually sideload an update, then do the following:

  1. Determine the regional variant of your phone. Once again, use Oxygen Updater to do so, as it checks against an internal database which greatly reduces the probability of a wrong selection.
    Oxygen Updater device variant
  2. Download the update package you want to install on your phone using Oxygen Updater. You can also find the direct links on our articles, which are easier to use on a PC/Mac in conjunction with a download manager app.
    • As mentioned earlier, try to opt for the full ZIP whenever possible. Applying an incremental update requires delta patching, which is only possible when the corresponding base version isn’t tampered at all.
  3. Move the update package to the root of the internal storage of your phone.
  4. In order to unlock the local install feature, you need to enable Android’s built-in developer options. To do so, navigate to Settings > About device > Version and tap the Build number section 7 times.
  5. Go back to the About device page, click on Up to date, then click on the three vertical dots menu at the top right corner, select Local install.
    OnePlus OxygenOS 12 About device OnePlus OxygenOS 12 Local install
  6. The file that you saved to the root directory should show up here. Select the file to start the local upgrade.
  7. Select Install Now to manually install the OxygenOS update on your OnePlus phone.
    OnePlus OxygenOS 12 Local install now
  8. Once the installation is finished, navigate to the About phone page to verify the build number.

In some cases, you’ll need to install a separate app to force-enable the feature. OnePlus provides quite a few variations of this standalone “System update” app across its forums, but the one linked below should be compatible with most of its devices.

Download OPLocalUpdate APK

After installing the APK, all you need to do is open the System update app from the app drawer. It will automatically detect a valid update package if it’s placed at the root of the internal storage of your phone. Next, tap on the file name to begin the update procedure.

Note: A few OnePlus phones have their updates delivered in the form of split ZIP archives (internally known as “component OTA”). Currently, we are not aware of a simplified manual installation process for this type of OxygenOS OTA. We’ll update the article when we get more information on this particular scenario.


Special case: Downgrading

Normally, you can only upgrade to a higher build version. The local install feature of OxygenOS prevents you from sideloading an older build for security reasons. With that said, OnePlus indeed offers a special kind of firmware builds (commonly referred to as “rollback packages”) which are intended for downgrading the currently installed OS.

Downgrade packages listed in a OnePlus forum thread

Rollback packages listed in a OnePlus forum thread

During a major transition period (e.g. from OxygenOS 12 to OxygenOS 13), the company provides official downgrade ZIP files that can be used to revert back from beta/developer preview to the stable channel. Although the manual sideloading process for those packages isn’t much different from regular updates, they forcibly wipe out the target device during the installation phase. Hence, it is better to backup all your data before attempting a downgrade.


Conclusion

And that’s all there is to it. You should be upgraded onto whatever OxygenOS version you need for without waiting for OnePlus to push the update to your phone. Besides, you can now easily roll back to a previous version of OxygenOS using the manual installation process as well.

Thanks to XDA Senior Member Some_Random_Username for the assistance.


If you have any queries regarding the installation process, let us know in the comments section below!

The post How to manually install OxygenOS OTA updates on your OnePlus phone appeared first on XDA.


from XDA https://ift.tt/bfjrwgy
via IFTTT
samedi 1 octobre 2022

Foldables are cool, but they’re not as good as Samsung wants you to think they are

When many people think about the best foldable phones, I think the idea that resides in their minds is a smartphone that can transform into a tablet. It is the ultimate blend of productivity and portability. While the technology is still young right now, in the future, the dream is that you will have a device without compromise. That means what you will have in your hand will be a powerful, compact, durable, and, most importantly, affordable foldable smartphone. Samsung is widely hailed as one of the pioneers in the foldable smartphone space, and rightfully so, as it has four iterations of its Galaxy Z Fold and also four iterations of its Galaxy Z Flip line. Millions of customers have experienced foldables in a mass-market product, and Samsung takes credit for it.

But Samsung is also often criticized for not innovating, and in recent years, this is probably true. With little competition in the United States, the company has had no reason to really push the boundaries on its flagships and on its foldables. But on the flip side, its iterative updates year after year give it the most mature and refined lineup out of any manufacturer offering foldable devices. While there’s a case for foldable smartphones like the Galaxy Z Fold, I feel like the same can’t really be said about the Galaxy Z Flip. Samsung delivers its latest Galaxy Z Flip 4 with the taglines:

“More compact. Improved battery. Faster processor. Tougher design. Better low-light pics.”

These are five pillars that Samsung is leveraging when it comes to advertising why you should buy its Galaxy Z Flip 4. It focuses on the size of the phone, how much battery life it has, its computational power, tougher design, and a camera that can perform in all scenarios, but especially in low light. But I’d argue that most of these are the reasons why the Galaxy Z Flip 4, or the  Galaxy Z Flip line for that matter, shouldn’t even exist. Although the Galaxy Z Flip series has become popular, I think it’s mostly due to it being a novelty and, more importantly, its affordability.

As a long-time user of the Galaxy Z Flip 3, I made the choice to skip the Flip 4 and move on to something different, despite Samsung offering tremendous trade-in promotions on its latest foldable models. For me, the Galaxy Z Flip 4 just simply didn’t match the expectations or the experience of a traditional smartphone. I think for all of us, there’s a baseline expectation at this point, and the Z Flip just doesn’t meet that standard for me. Some might think that the opinions expressed here are blasphemous, but I urge you to have an open mind, and I also urge you to share your experiences with the Z Flip because I’d love to hear them. 

Short and stout

I can still remember the rush that I felt when I unfolded the Z Flip 3 for the first time. But just as quickly as the feeling had come, it quickly dissipated as soon as I folded it shut. Was it supposed to be like this? I imagined my first time with a foldable would feel more surreal. Maybe my expectations were too high. Not really thinking too much of it, I went through the setup process, looked through menus, and spent some time getting to know the phone. From that day forward, it was going to become my primary device, replacing my Galaxy S20 Ultra. 

Perhaps one of the first things that I noticed was that I didn’t like the thickness of it in my pocket. It’s probably something that I should have been expecting looking over the specifications. While the phone had a smaller footprint, in my pants, it didn’t feel more compact. The fact that the phone had become twice as thick made it difficult to stash in a pant pocket compared to a regular smartphone. Now, you can stow it away into a bag, and this scenario is a bit better, but again, you run into the same issue of thickness. The volume of the phone remains the same, it’s just changed shape, and I think not for the better.

Folding a phone doesn't change its volume. It has just changed shape, and I think not for the better.

This part is purely subjective, so you either prefer a smartphone that is tall and thin or one that is short and thick. At this point in time, you really can’t have the best of both worlds, but Samsung doesn’t even really hit the sweet spot, but I think eventually we’ll get there.

Battery life was always something to watch out for

The Galaxy Z Flip was the phone that I relied on every single day. I’d have train commutes where I’d listen to a couple of hours of music and sometimes even hop on Google Maps for navigation. Sometimes I’d need to perform translations, and of course, there was communication through apps like WhatsApp, Line, and Google Voice. Sometimes I’d watch videos or get in some light gaming, pretty much just normal everyday use. I’ve never been a power user when it comes to smartphones, and I have generally been able to get by with just moderate battery drain after a full day’s use. But with the Galaxy Z Flip, things were different.

Galaxy Z Flip 4 at a 90-degree angle

I never managed to kill the battery, but I was always forced to be mindful, sometimes even enabling the power-saving mode to ensure that it would get through a full day when out and about. Sure, the phone packed a lot of power with its robust processor, but on the flip side, the battery life felt insufficient. Maybe my experience was a bit skewed, especially coming from a device that had a 5,000mAh battery and dropping down to a phone that has 3,300mAh. But looking back, plenty of phones that came out during that time had batteries large than 3,300mAh. I know there’s obviously a limitation when it comes to the construction of a foldable, but I think when you’re plopping down $1,000 for a phone, it should have a battery larger than 3,300mAh.

Imagine if Samsung released a traditional Galaxy phone for $1000 that looked amazing and it came with a battery that size, you wouldn’t hear the end of it. I think a lot of people give the Z Flip a pass because the phone folds, but in the end, it’s the consumer that has to sacrifice. This is a classic case of form over function. But the sad part is that the form doesn’t really add anything to the experience. I’m well aware of Flex Mode. But come on, I don’t think anyone really needs their app to be squished into a small window just so we can get access to clunky controls and features that make the experience go backward. 

Tougher shell, but the display still was relatively delicate

The Galaxy Z Flip is touted as having a tougher design, fortified by Corning’s Gorilla Glass, offering IPX8 water resistance and an Armor Aluminum frame. As far as the display goes, Samsung’s Ultra Thin Glass provides enhanced durability that has been tested through 200,000 folds. Perhaps the best thing foldable phones have going for them when it comes to durability is the fact that they can fold up to protect the display. But when you open the phone, it’s a different story.

I don’t know about everyone else, but when I used the phone for the first few months, I felt like I had to baby it. After a while, I got used to the experience, but no matter how much I tried to treat it like a normal phone, there was always a part of me that was concerned. It never felt like it was on par with a normal phone. Maybe I was overly protective of the display? But seeing enough horror stories online made me realize that no matter how protective I was, the display was just another part to be concerned about when I really shouldn’t. 

Better low-light pics

The image quality of the Z Flip hasn’t been the best and was always a little bit behind Samsung’s flagships. The same applies to the Z Flip 3, and the same can be said about the Z Flip 4. This part is a little trickier to discuss because, in the past, Samsung has made a conscious effort to offer a lower-quality experience from its higher-end lines as a cost-cutting measure. It’s hard to say whether that kind of practice is still occurring in its latest model, but regardless, the quality of the cameras is good, it’s just not going to beat out other phones in the same price group. I hate to sound like a broken record at this point but again, for a $1000 phone, we are looking at sacrifice and compromise, and in one of the worst ways possible.

Foldables have their own compromises, so know what you are getting into

The Z Flip 3 and 4

Galaxy Z Flip 3 (back) and Z Flip 4 (front)

I think we can kind of see a trend and where my mindset is after exploring just some of the pillars about the latest Samsung Galaxy Z Flip 4 or the Z Flip line as a whole. When it comes to owning or using a foldable smartphone like this, there are just compromises. You’re either okay with that somewhere in the middle, or you aren’t. But I think where I tend to get hung up the most is the amount people are paying for this experience.

Of course, maybe the compromises mentioned above aren’t dealbreakers for you, but for me, I just can’t stand it when I’m actively using it every day. But, I’m grateful that I got to experience it because without actually living with a foldable smartphone, you really just won’t know.

These are just some of the personal reasons why I think the Galaxy Z Flip line doesn’t need to exist. If Samsung is just taking a slab phone, a design that has been pretty much refined to the point of perfection, and then just adding a crease to it at the expense of convenience, battery life, durability, and features, this is when I think we need to step back, rethink the product line as a whole and ask ourselves how the Z Flip line can be better.

As a reminder, this isn’t a piece written to try and incite ill feelings, it’s just an opinion, and after all, these are just products. But I’d love to hear your thoughts on the Z Flip line, especially if you’ve found that the phone actually improves your experiences on a day-to-day basis.

The post Foldables are cool, but they’re not as good as Samsung wants you to think they are appeared first on XDA.


from XDA https://ift.tt/CARQxrD
via IFTTT
AMD Ryzen 7900X and 7950X review: Unsurprisingly, they’re the most powerful processors

It shouldn’t come as a surprise to anyone, but AMD’s new Ryzen 7000 processors are the best CPUs that you can get right now. After all, these things tend to go in cycles, so it should be no surprise that the new chips comfortably outperform Intel’s last-gen CPUs.

It’s not just about CPU performance though. AMD is delivering a whole new platform with AM5. Yes, that does mean that these processors require a new motherboard, but the company is promising to continue to use AM5 until at least 2025. AM4 lasted for five years and five generations, so with AM5, you’ll also be able to upgrade your CPU over time without having to buy a new board.

XDA Best Award
And while it’s always a pain point to have to buy a motherboard with a new CPU generation, there’s good reason for it. This new platform supports DDR5 and PCIe 5.0, so it’s not just about a new socket (which is LGA now).

My biggest issue, however, was with the Ryzen 9 7950X. No matter what I did, it would just randomly reboot my PC from time to time. There was no blue screen and nothing in the Event Viewer. I tried troubleshooting it with AMD, but no luck.

The Ryzen 9 7900X, on the other hand, has been a delight. Coming from a Core i9-12900K, my PC instantly felt faster and I did not have a single headache no matter what I was doing. That’s the one I’d have to recommend, even if it’s not as highly-specced as the Ryzen 9 7950X.

    AMD Ryzen 9 7900X and 7950X
    AMD Ryzen 7000 offers the best performance that you can get right now, packing up to 32 cores and more.

      Features:

      Pros:

      Cons:

Navigate this review

AMD Ryzen 9 7900X and 7950X pricing and availability

  • The AMD Ryzen 9 7900X and 7950X cost $549 and $699, respectively
  • They’re available as of September 27

AMD’s high-end Ryzen 7000 lineup was released as of September 27, so you can get it now. The lineup currently consists of its more powerful processors, which tend to be geared toward gamers.

It starts with the Ryzen 5 7600X, which costs $299, and then there’s the Ryzen 7 7700X for $399. For the really high-end parts that we’re reviewing here, you can get the Ryzen 9 7900X for $549 and the Ryzen 9 7950X for $699. There are a range of retailers that you can get them from, from Amd.com to Best Buy.

AMD Ryzen 9 7900X and 7950X specs

AMD Ryzen 9 7900X AMD Ryzen 9 7950X
# of CPU cores 12 16
# of threads 24 32
Max boost clock Up to 5.6GHz Up to 5.7GHz
Base clock 4.7GHz 4.5GHz
L1 cache 768KB 1MB
L2 Cache 12MB 16MB
L3 Cache 64MB 64MB
Default TDP 170W 170W
Processor technology for CPU cores TSMC 5nm FinFET TSMC 5nm FinFET
Unlocked for overclocking Yes Yes
CPU socket AM5 AM5
Thermal solution Not included Not included
Max. operating temperature (Tjmax) 95 degrees C 95 degrees C
Memory channels 2 2
Max memory speed 1X1R 5200MT/s
1X2R 5200MT/s
2X1R 3600MT/s
2X2R 3600MT/s
1X1R 5200MT/s
1X2R 5200MT/s
2X1R 3600MT/s
2X2R 3600MT/s
Graphics AMD Radeon, two cores AMD Radeon, two cores
Graphics frequency 2,200MHz 2,200MHz
GPU base 400MHz 400MHz
Price $549 $699

AMD Ryzen 9 7900X and 7950X build specs

Component Part used Price Retailer
CPU AMD Ryzen 9 7900X
AMD Ryzen 9 7950X
$549
$699
Best Buy
Best Buy
Graphics card Nvidia GeForce RTX 3090 $1,200 Amazon
Case Corsair iCUE 4000X RGB $129.99 Amazon
CPU cooler Noctua NH-U12A
Corsair H150i Elite Capellix
$109.95
$184.99
Amazon
Amazon
SSD Samsung 980 1TB $99.99 Amazon
Memory 2x16GB Trident Z5 Neo DDR5-6000 $229.99 Newegg
Motherboard ASRock X670E Taichi $499.99 Newegg
Power supply Asus ROG Thor 1200W 80+ Platinum $349.99 Amazon
OS Windows 11 Pro $199.99 Amazon

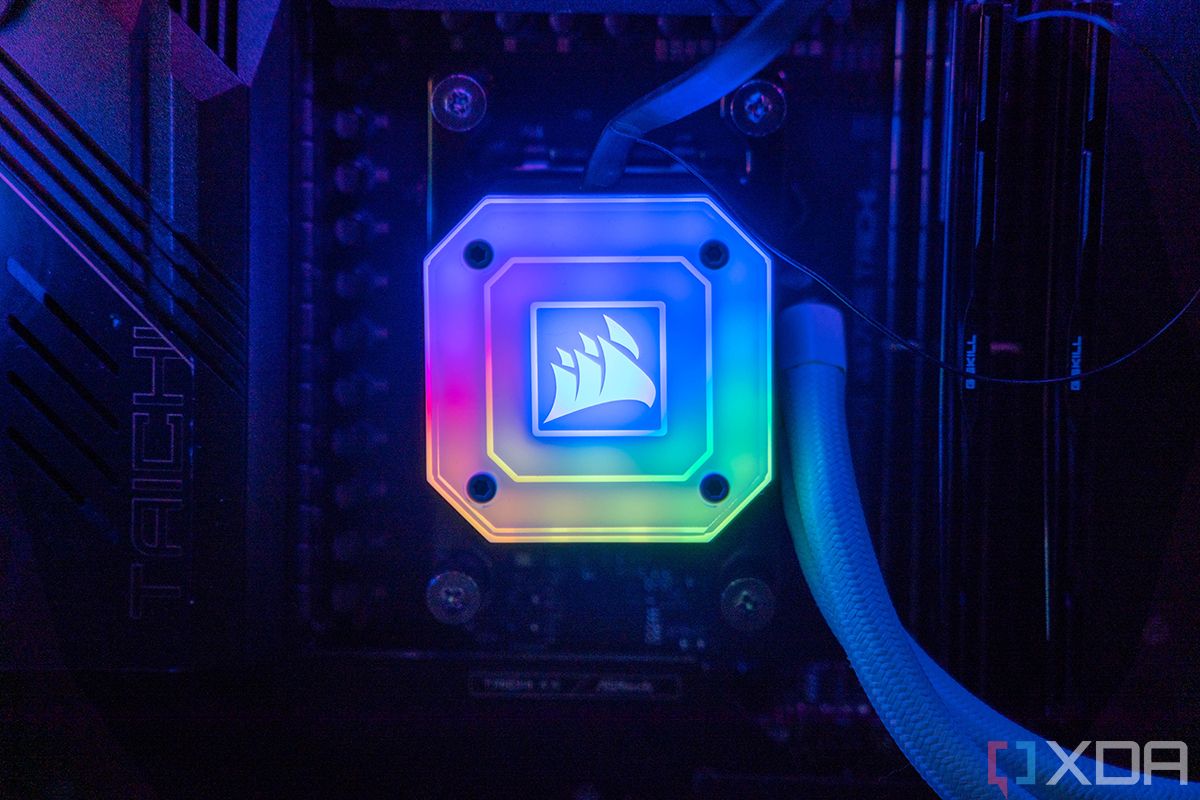
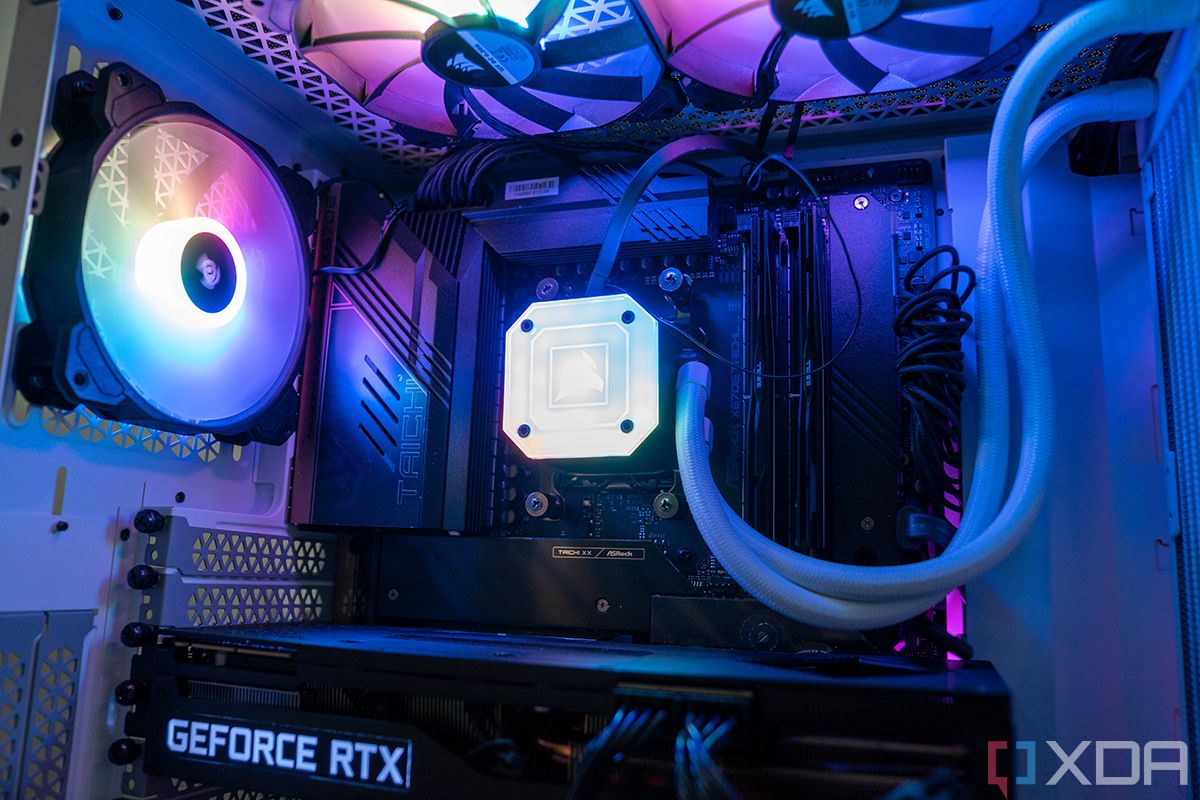
Some things have changed since my last build, which was when I reviewed Intel’s 12th-gen processors. I’ve ditched my old Asus TUF case, as Corsair has sent over this stunning iCUE 4000X, which comes in white or black (I chose white). I also asked Corsair for an H150 Elite Capellix liquid cooler. It’s not that my old Noctua U12A is inadequate. It’s quite good, in fact, and the fans are as quiet as promised. It’s just kind of unsightly. The thing is massive, and I wanted something that’s smaller and more stylish. To keep things equal with my Core i9-12900K testing, I used the Noctua for the initial stages of AMD testing, and then switched to the Corsair H150i.

PC build with Corsair cooler

And then, of course, we have the parts that AMD sent me for this review, including the two Ryzen 9 processors, the ASRock X670E Taichi motherboard, and 32GB of its new Expo memory.

A new motherboard and new memory

As you may have heard, AMD Ryzen 7000 uses the new AM5 platform. This is good news and bad news. The bad news is that if you’ve got an AM4 board and you’re looking to upgrade, the newest you can go is Ryzen 5000. The good news is that AM5 will be supported until at least 2025. AM4 was supported for five years across five generations, so AMD does like to keep these things around for a little while.

AMD is supporting AM5 until at least 2025, something Intel has not promised for LGA 1700.

Another thing to note is that AM5 only supports DDR5 memory, unlike Intel’s newest generations, which support both DDR4 and DDR5. That means that if you’re upgrading, you’ll need to shell out for the CPU, the motherboard, and the memory. While the board will support a PCIe 5.0 SSD, you’ll still be able to use a PCIe 4.0 unit; PCIe 5.0 SSDs aren’t even out yet.

Benchmarks

Geekbench 5

Geekbench is a CPU test. To be clear, the CPU is the thing that we’re focusing on here. There will be other tests later that take on graphics, but there’s a reason I used the RTX 3090 in the build. AMD said that the integrated Radeon Graphics basically have the power to light up displays. In other words, you can get by with productivity tasks, but the company made no other promises.

Core i9-12900K Ryzen 9 7900X Ryzen 9 7950X Ryzen 9 7950X with Corsair H150i
1,989 / 17,794 2,204 / 18,833 2,172 / 21,766 2,155 / 21,896

Listed scores are single-core / multi-core

As you can see, these scores are really impressive. All of the scores beat the Core i9-12900K, which is to be expected. And yes, Intel has announced its 13th-gen processors, but for now, we have the i9-12900K to compare it to.

Note that the Ryzen 9 7900X does better on single-core performance while the Ryzen 9 7950X does better with multi-core. The latter does have a lower base clock, and it does have 33% more cores.

One thing that’s nice about Geekbench is that you can also look up scores of other products that have been tested. The previous generation models, the Ryzen 9 5900X and Ryzen 9 5950X, scored 1,669 / 13,946 and 1,684 / 16,477, respectively. I’m particularly excited to see the boost in single-threaded performance, which is critical to many work flows.

Cinebench R23

Cinebench is another benchmarking application that tests CPU performance, but this one is focusing on rendering.

Core i9-12900K Ryzen 9 7900X Ryzen 9 7950X Ryzen 9 7950X with Corsair H150i
2,017 / 26,802 2,005 / 28,893 1,917 / 36,364 1,941 / 37,327

Listed scores are single-core / multi-core

The Ryzen 9 7950X has the best multi-threaded performance on the market right now.

Obviously, the Ryzen 9 7950X has the best multi-threaded performance on the market right now.

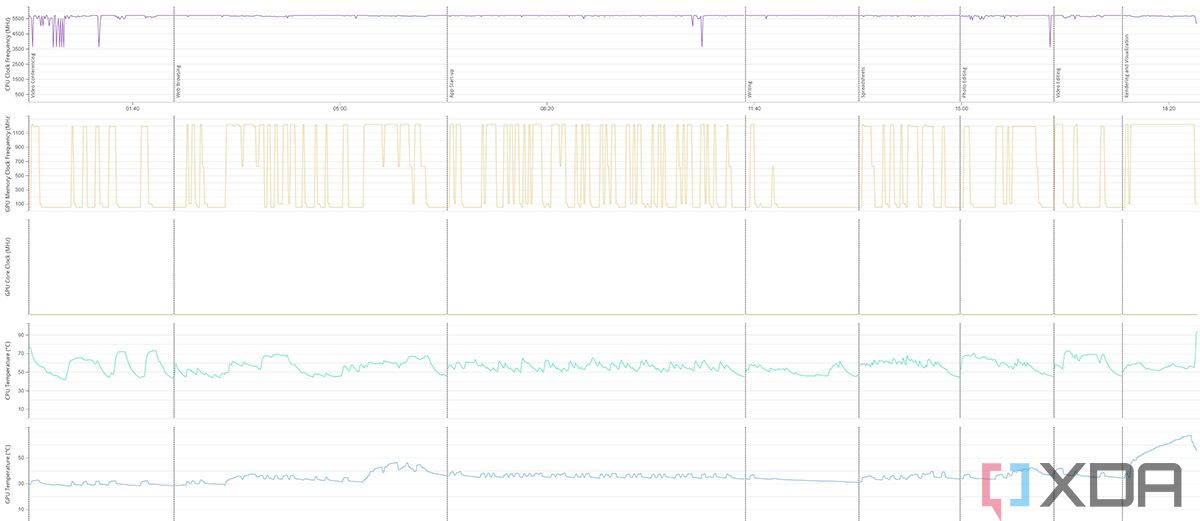
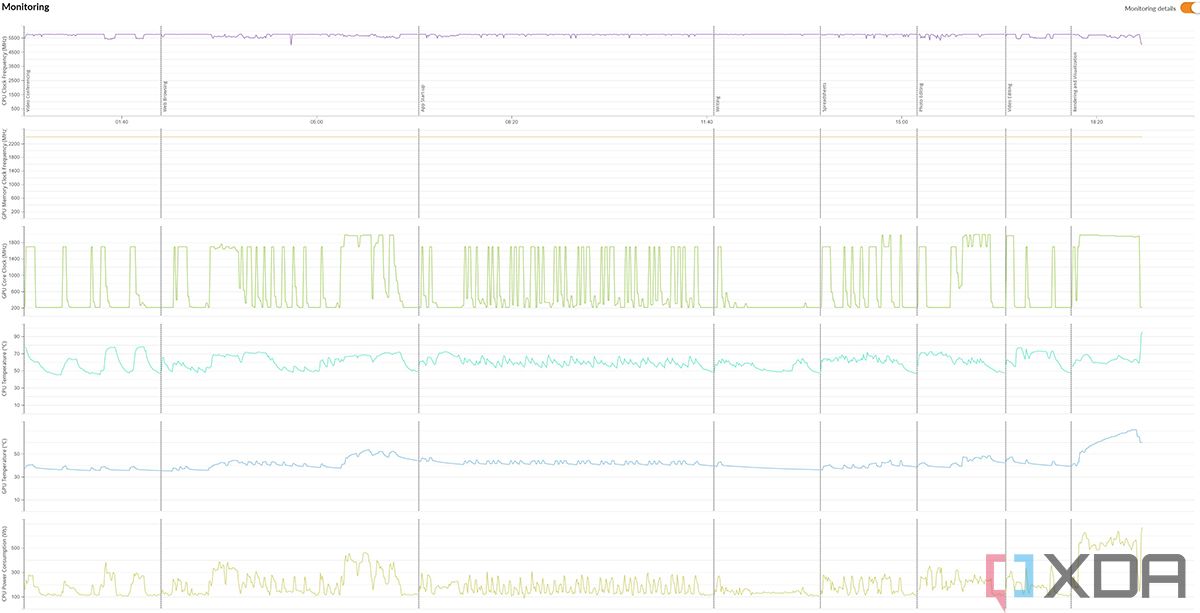
I also recorded the system status using NZXT Cam. Running Cinebench multi-core is actually the best way to crank up the CPU temperature to Tjmax, which is 95 degrees Celsius. If it tries to go beyond that, it will start to throttle. This is where you should start to benefit from a better CPU cooler.

Also, to be clear, I did not recording NZXT Cam while running the tests that you see above. These were run separately.

As you can see, multi-core testing easily hits that 95-degree mark. When AMD first showed us this in Austin, TX, it managed to get a Cinebench multi-core score of 48k and change by usin liquid nitrogen to cool it and by overclocking it. That was a world record. In fact, AMD recently boasted 48,235 in Cinebench R23 multi-core by boosting the Ryzen 9 7950X to 6.45GHz on all cores and using a Reaktor 2.1 LN2 pot, along with the same board and memory we’re using in this build. With conventional cooling, the company was able to get a score of 40,498.

PCMark 10

PCMark 10 is more of a general test. It checks a bit of everything, so the GPU is more of a factor here than it is in Cinebench and Geekbench. These tests, along with 3DMark and VRMark, are why I made sure to keep things equal between the three processors. The graphics card is the same, as is the power supply and the cooler. And of course, all tests were also run with the Ryzen 9 7950X and a new cooler.

Core i9-12900K Ryzen 9 7900X Ryzen 9 7950X Ryzen 9 7950X with Corsair H150i
8,067 9,151 9,160 9,204

You can probably see the theme here. Ryzen 7000 smokes Intel 12th-gen, although interestingly, there isn’t much of a gain from the Ryzen 9 7900X to the Ryzen 9 7950X.

Ryzen 9 7900X Ryzen 9 7950X Ryzen 9 7950X with Corsair H150i
Screenshot of thermals while runnning PCMark 10 Screenshot of thermals while runnning PCMark 10 Screenshot of thermals while runnning PCMark 10

As mentioned earlier, these processors are designed to run at up to 95 degrees Celsius, and as long as the temperature stays below that, which is did for the duration of these tests, the chip won’t throttle. That’s why the CPU clock speed remains relatively uninterrupted.

3DMark

While 3DMark’s Time Spy test does use both the CPU and the GPU, it does provide separate scores for each. Below is the overall score / GPU score / CPU score.

Core i9-12900K Ryzen 9 7900X Ryzen 9 7950X Ryzen 9 7950X with Corsair H150i
Time Spy 17,571 / 17,561 / 17,633 17,741 / 18,636 / 13,947 17,980 / 18,721 / 14,690 17,972 / 18,671 / 14,830
Time Spy Extreme 9,182 / 9,183 / 9,179 9,439 / 9,443 / 9,419 9,812 / 9,539 / 11,719 9,731 / 9,464 / 11,590

Interestingly, the Core i9-12900K did better on the Timy Spy test, while the Ryzen 9 units did much better on Time Spy Extreme. It’s also notable that the Ryzen 9 7950X, no matter which cooler it was using, performed so much better than the Ryzen 9 7900X.

VRMark

VRMark is pretty straightforward. It offers three tests of varying complexity. The Orange Room test will hit its targets on a laptop with mediocre dedicated graphics. The Blue Room test requires high-end hardware.

Core i9-12900K Ryzen 9 7900X Ryzen 9 7950X Ryzen 9 7950X with Corsair H150i
Orange Room 15,419 18,546 20,313 20,272
Cyan Room 14,954 17,844 12,743 12,868
Blue Room 5,809 6,159 6,210 6,085

Again, there are big gains here over Intel 12th-gen, and the scores all hit their targets in the most complicated tests. Of course, a big part of that is GPU performance though.

MaxxMEM2

I used MaxxMEM2 to test the memory. Unsurprisingly, the newer and faster memory is…faster.

Corsair Vengeance 2x32GB DR5 DRAM 4400MHz G.SKILL Trident Z5 Neo Series AMD EXPO 2 x 16GB DDR5-6000
Overall 38.59 50.82
Read 28,756 51,956
Write 46,762 43,855
Copy 40,249 56,638
Latency 84.00

What’s really new here is AMD Expo, which is basically AMD’s version of Intel’s Extreme Memory Profile, or XMP. Similar to what it did with FreeSync while Nvidia was pushing its proprietary G-Sync, AMD Expo is open for anyone to use.

Issues with the AMD Ryzen 9 7950X

AMD initially sent me the Ryzen 9 7900X and Ryzen 9 7950X to review, although later, it also sent over the Ryzen 5 7600X and the Ryzen 7 7700X. I started with the 7900X, moved onto the 7950X, and as I write this, I’ve been using the Ryzen 5 7600X for about 48 hours now. The Ryzen 9 7950X is the only one that I’ve had issues with.

I’m talking about random reboots, and I still have no idea what caused them. I reached out to AMD, which said it was probably my 1,200W PSU and to make a few adjustments. While I made the suggested adjustments, they didn’t work, and to be clear, this isn’t happening when the PC is under load. There’s no blue screen, and there’s nothing in the Event Viewer. Also, PSU issues that I’ve had in the past have caused the machine to shut down, rather than reboot.

Corsair AiO cooler on motherboard

I also tried reseating the CPU. That didn’t work either.

There were some patterns that I noticed at times. During one workday, the PC randomly rebooted three times, and it just so happened that all three times were during Google Meet meetings. This wasn’t true for other days, because like I said, I still can’t declare what the problem was or reproduce it.

Intel 13th-Gen is here too

While all of our tests compared these two processors to the Intel Core i9-12900K, we shouldn’t forget that Intel just announced its 13th-Gen processors. We’ll be testing those soon, but here’s a rundown of the offerings.

Processor Cores / Threads Base / Max cllock speed (GHz) Cache TDP Price
AMD Ryzen 5 7600X 6 / 12 4.7 / 5.3 38MB 105W $299
Intel Core i5-13600K 14 (6P +8E) / 20 3.5 (P) 2.6 (E) / 5.1 (P) 3.9 (E) 44MB 125W-181W $319
Intel Core i5-13600KF 14 (6P +8E) / 20 3.5 (P) 2.6 (E) / 5.1 (P) 3.9 (E) 44MB 125W-181W $294
AMD Ryzen 7 7700X 8 / 16 4.5 / 5.4 40MB 105W $399
Intel Core i7-13700K 16 (8P + 8E) / 24 3.4 (P) 2.5 (E) / 5.4 (P) 4.2 (E) 54MB 125W-253W $409
Intel Core i7-13700KF 16 (8P + 8E) / 24 3.4 (P) 2.5 (E) / 5.4 (P) 4.2 (E) 54MB 125W-253W $384
AMD Ryzen 9 7900X 12 / 24 4.7 / 5.6 76MB 170W $549
AMD Ryzen 9 7950X 16 / 32 4.5 / 5.7 80MB 170W $699
Intel Core i9-13900K 24 (8P + 16E) / 32 3.0 (P) 2.2 (E) / 5.8 (P) / 4.3 (E) 68MB 125W-253W $589
Intel Core i9-13900KF 24 (8P + 16E) / 32 3.0 (P) 2.2 (E) / 5.8 (P) / 4.3 (E) 68MB 125W-253W $564

Intel’s processors use a hybrid architecture, so they all have a varying number of performance cores, or P-cores, and efficiency cores, or E-cores. Obviously, those have different frequencies; also only the P-cores are hyperthreaded, which is where that thread count comes from.

Specs aside, one thing that’s really important to note is that while AMD has promised to use its new AM5 platform for several years to come (until at least 2025), Intel hasn’t. It started using the LGA 1700 socket with its 12th-gen chips, and the previous LGA 1200 socket had only lasted for two generations. Indeed, if you plan to upgrade your CPU and don’t want to have to buy a new motherboard when you do, AMD has a much better track record than Intel does.

Who should buy the AMD Ryzen 9 7900X or Ryzen 9 7950X

You should buy the AMD Ryzen 9 7900X or Ryzen 9 7950X if:

  • You’re a gamer that wants maximum CPU performance
  • You plan on upgrading your CPU again between now and the end of 2025
  • You’re willing to buy a new motherboard and memory as well

You should NOT buy the AMD Ryzen 9 7900X or Ryzen 9 7950X if:

  • You don’t do CPU-intensive tasks, where you’d be better off with a Ryzen 5 or Ryzen 7 (reviews on those coming soon)
  • You don’t want to spend extra for the Ryzen 9 7950X, and still have to buy DDR5 memory

Let’s face it. Yes, you’ll have to buy a new motherboard, but unless you’re upgrading to a previous-generation product, you’ll be doing that whether you go Intel or AMD. The difference with AMD is that AM5 will likely have more longevity than Intel’s LGA 1700 socket.

    AMD Ryzen 9 7900X and 7950X
    AMD Ryzen 7000 offers the best performance that you can get right now, packing up to 32 cores and more.

      Features:

      Pros:

      Cons:

The post AMD Ryzen 7900X and 7950X review: Unsurprisingly, they’re the most powerful processors appeared first on XDA.


from XDA https://ift.tt/Oztr5an
via IFTTT